Assuming you are at a Conference and you have recorded the happenings of the event and now you want to share or save them on your phone but it takes up too much space? Well, we understand that you are both interested in the audio quality as well as the video quality. Therefore, what you have to do is to compress the MP4 to a smaller size. When you compress files, you will reduce the file size into a manageable size. The next question is how will you compress the MP4 video while retaining the video quality? In this article, we show you how to compress files using online and using a desktop MP4 Compressor.
1. Compress MP4 using Online Uniconverter
The first way that you can compress MP4 files is by using the Online Uniconverter Compressor. This MP4 online compressor works with popular video formats and it is free to use. Moreover, it is free to use and renders compressed videos in high quality. Below is a guide on how to compress MP4 video using Online Uniconverter Video Compressor.
Step 1: Add MP4 Files
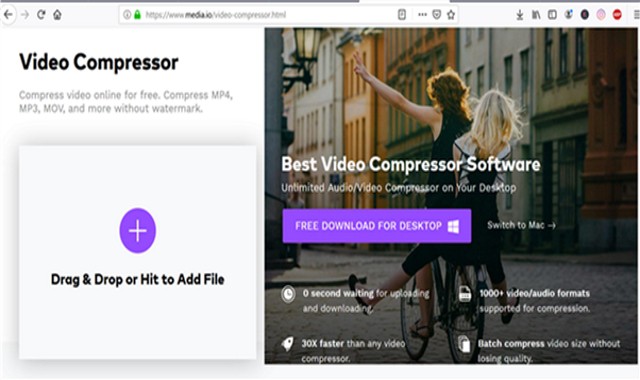
First, visit the Online Uniconverter website and click on the add button under the “Drag & Drop or Hit to Add File” button. From, there, you can upload the MP4 file from your computer. This platform also allows you to drag and drop the files to be converted directly from your computer.
Step 2: Enter Compression Settings
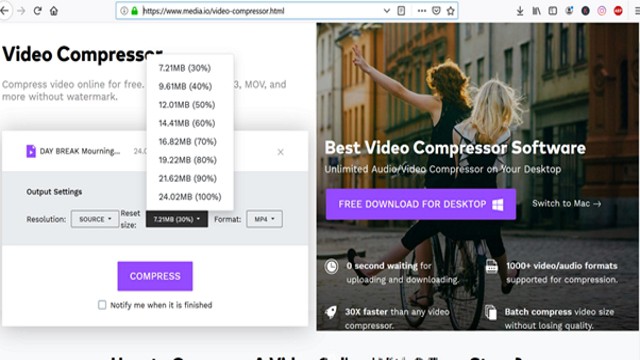
After that, you have to set the compression output settings. Click on “Resolution” and choose the preferred quality. After that, choose the Reset Size and retain the format as MP4. With the reset size, you will be able to see the percentage to what the file will be reduced to after conversion.
Step 3: Compress MP4 File
After that, you can now click on “Compress” button and the Online Uniconverter will begin to compress the file. Once it is complete, you can then download the MP4 file back to your computer within a click.
Remember with this platform you can tick on “Notify me when it is finished” and you can keep doing your own work aside. Once the compression is complete you will be notified.
2. Use Uniconverter Desktop app
Well, it is with no doubt that Online UniConverter is a great Online Video Converter but when it comes to desktop compression, you need to use Wondershare Uniconverter for Desktop. The desktop version is fast, supports batch compression and it supports a wide variety of file formats. Besides the Uniconverter Desktop comes with other media features such as the ability to convert, download videos online, burn DVD media and transfer files to your external device. Here is a guide on how to use UniConverter (Desktop) to Compress MP4 video.
Step 1: Select Video Compress
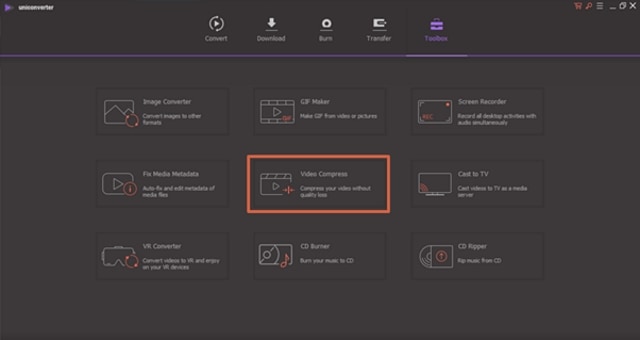
Once you have installed the software, open the software and click on “Toolbox” and then choose the “Video Compress” option. From there, click on the add button and choose an MP4 file from your computer and open it with the computer. You can also drag and drop the file to the Uniconverter interface and it will be uploaded.
Step 2: Set Compression Settings
Next, a compression window appears where you can begin to adjust File size, format, quality, resolution, and the MP4 bit rate. For the resolution, you have the cursor around the horizontal shown in it. Once you have done the correct compression settings, the program will display to what percentage the file will decrease to eventually.
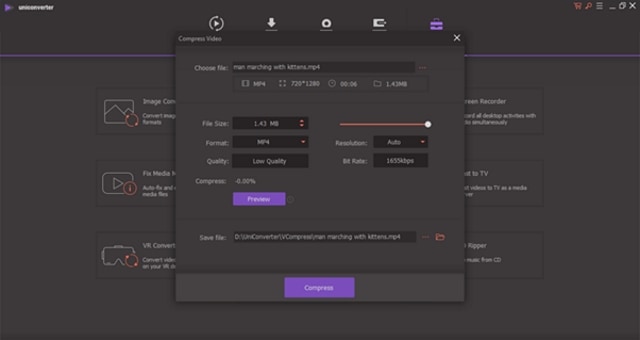
After that, you can now click on “Preview” and check to see the quality outcome of the new reduced file.
Step 3: Compress File
Next, click on the “Save” box and choose where to save the compressed file on your computer. Finally, click on “Compress” button and wait for the program to compress the MP4 file within seconds.
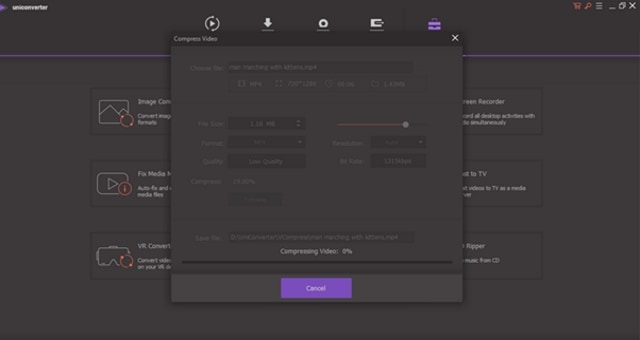
Once it did you will see the notification “Compress Successfully” and you can now open the file in the location defined.
The difference between Online and Desktop
At this point, you have seen that both the Online and Desktop Uniconverters allows you to compress the MP4 files easily. Besides Online Uniconverter being a web-based and Wondershare UniConverter Desktop being an application what are other distinguishable differences?
Compatibility
The first difference between Online Uniconverter and Desktop Uniconverter is the compatibility of files. Although both platforms support audio and video formats, Online converter supports limited file formats whereas the Desktop Uniconverter supports unlimited file formats. In fact it the Desktop Uniconverter supports over 1000 file formats of both audio and video formats.
Supported File Size
Another difference between the two video compressors is the supported file size. With Online Uniconverter Video compressor you cannot work on a file that is more than 100MB. On the other hand, Desktop Uniconverter does not have any file limit. You can upload a video or audio file of any that is on file size.
Difference in Features
With Desktop Uniconverter, you will see that it is an all in one tool with all the features built within the software. It is built with a converter, editor, DVD burner, a transfer tool and a toolbox with different features. On the hand, the Online converter has a compressor, converter, and editor within different links but accessed through the main platform.
Knowledge Base: Wondershare Technology
Desktop Uniconverter and Online Uniconverter are products of Wondershare Technology. You could be wondering what Wondershare Technology is. It is a publicly listed company that has been in operation over the past years now and counting.
Moreover, Wondershare Technology is well known for its expertise in designing Video and Audio software that has amassed a lot of users worldwide due to its unapparelled software products. As mentioned earlier some of its products in the market now include the Wondershare Uniconvertor for Desktop, Wondershare Online Uniconverter, and the popular Filmora Video Editor.
To conclude, Wondershare Technology products are effective, secure, trusted and will help you improve your performance anytime. You can install this software on your Mac or Windows platforms always.


