
Planning to hit the road for a long trip?
Perhaps a family holiday or an adventure with your friends?
It’s always wise to inspect your car prior to the drive to avoid any potential disasters.
A long drive is always a huge and strenuous test for a car. Even the slightest of problems might prove to be very troublesome. That is why you need to do a thorough mechanical inspection to ensure it’s up to the task.
Things to Check
Here are the parts to focus on as you do the inspection:
1) Leaks and hoses
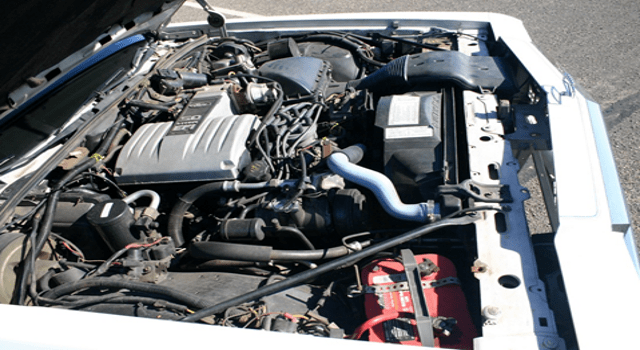 The overall health of your car largely depends on its fluids. If the hoses are lose and/or leaky the vehicle won’t run to its best capacity. But how do you go about checking them?
Start by checking their ends. That is where they experience a lot of stress on account of attaching to other parts. Make sure there are no cracks and breaks that can cause leaks.
Proceed to check the middle part of the hose. Most of them are exposed to very high temperatures of up to 200+ degrees. It’s only normal they will wear and tear over time.
Again, make sure there are no damages. Bulges and blisters are strong indications that the hose is leaking or will leak.
2) Battery
 If your car’s battery dies you will be stranded, it’s as simple as that. Ideally, it should not go below 9.5 volts. Otherwise the car won’t start and neither will its electronic systems.
At times power failure is not caused by low battery voltage. It could be a case of corroded or lose terminals. So make sure both the positive and negative ends are corrosion-free and tightly in place.
3) Tires
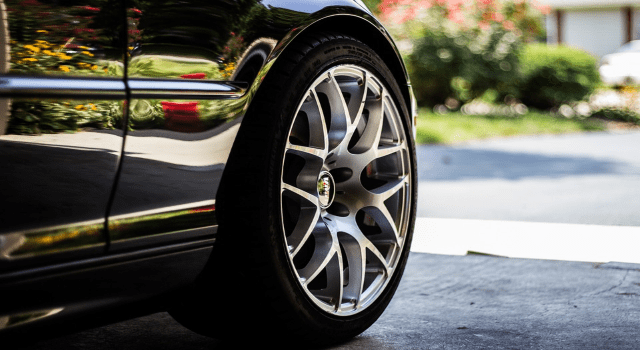 When it comes to tires you need to check their pressure and tread. As far as pressure goes, each tire’s inflation must match its pounds per square (PSI). You will often get the recommended PSI when you buy the tire.
Now check the tread on all the tires. If you have a tread depth gauge you can use it for that. New tires will typically have a 10/32” tread depth, but anything above 3/32” should be okay. Any tire with a reading lower than that needs to be changed.
4) Engine oil and coolant
 For the engine oil, simply check the date its due for a change and do so if necessary. Since you will be going a long distance you may want to consider a synthetic oil. It will protect the engine against thermal breakdowns.
The coolant (also known as antifreeze) is what keeps the engine cool despite the heat it generates. If it is low, the coolant pressure light will come on. But you don’t have to wait for that seeing as it might do so when you are somewhere remote.
Instead, check the coolant reservoir while still on the driveway. The proper amount should be 50% coolant and 50% water.
5) Lights

The light system is perhaps the easiest to inspect. Just work the switches and see if their corresponding lights work. You may need someone to walk around the car and check the lights as you work them.
Also, don’t forget to wipe off any dirt or dust from light covers.
6) Brake system
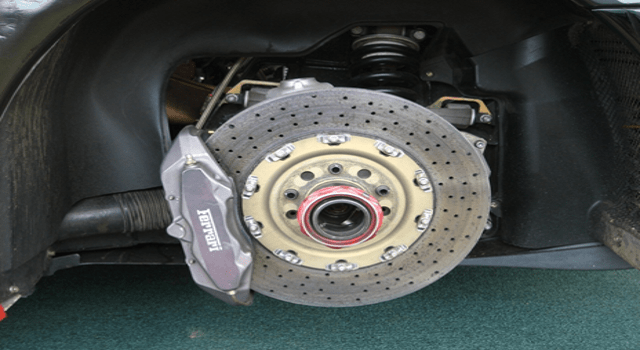 The two main things to check here are brake pads and brake fluid. You can see the pads when you look through the spaces between wheel spokes. Any signs of cracks or extreme wear means you need new brake pads.
On its part, the brake fluid keeps the hydraulic system of the brake working. It also lubricates the moving parts of the brake system. But as it ages, it ceases to lubricate and instead causes them to rust.
So when should you change the brake fluid? When it starts turning to a maple syrup color.
7) Gas cap
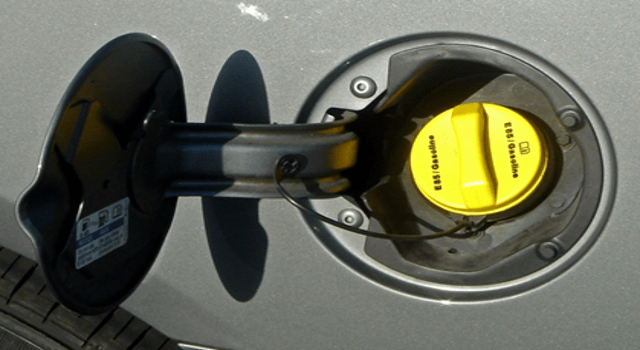 It might seem small but the gas cap is actually very important. Without it dirt and debris will enter the gas tank. Actually, if it is open or lose your gas cap light will come on to warn you.
Plus your car’s flapper valve will prevent fuel from flowing from the tank. Essentially you won’t be able to drive. So make sure the gas cap fits tightly before you start the trip.
8) Catalytic converter
 You don’t want to be the travel buff whose car emits poisonous gases. If your catalytic converter is faulty that’s exactly what you will be. It converts carbon monoxide, nitrogen oxide and hydrocarbons (all harmful) into carbon dioxide.
Other than that, a faulty catalytic converter will also lead to fuel inefficiency. Your car could also fail to accelerate or even start to begin with.
Check Your Car with an OBD2 Scanner
While using the checklist above is a good idea, you can make the inspection more thorough by using a computerized scanner. There are several tools that can do that. One of them, and perhaps the best in the market today, is the OBD2 Scanner.
What Is OBD2 Scanner?
OBD2 stands for Onboard Diagnostics II. So an OBD2 Scanner is a type of scanner that you can use to do a self-diagnostics for your vehicle. Essentially what it does is use your vehicle’s onboard computer systems to check if performance, emissions and other functions are working effectively.
Once an OBD2 scanner has checked your car, it will give a scan report in form of codes. Each code is basically a report of whether that function is working as it should or not. For instance, there is a code for low fuel pressure, exhaust leak, faulty PCV valve and any other mechanical problem.
How to Check Your Car with an OBD2 Scanner
The OBD2 scanner sounds like a handy device, doesn’t it? Well, it won’t be of much help if you don’t know how to use it. Luckily we have this summarized guide to help:
Step 1: Plug the OBD2 scanner into the port (found under the dash).
Step 2: Switch the scanner on. Depending on the model, it may draw its power from the vehicle.
Step 3: Turn the car’s engine on.
Step 4: Hit the ‘Scan’ button on the OBD2 scanner. It will run some tests while showing codes on the screen. That’s its way of talking to you, record the codes.
Step 5: Now interpret the codes. Each code will come as a combination of numbers and letters. Group them into four sections.
The first section consists of the first character. It’s always a letter.
The second section comprises of the second character. It is usually a single number that ranges from 0 to 3.
The third section consists of the third character. It is usually a single number that ranges from 0 to 9.
The fourth and final section includes the fourth and fifth characters. It is a pair of numbers ranging from 00 to 99.
The code you get will tell you what kind of problem your car has. For example, the code P0171 means System Too Lean (Bank 1). In simple terms that means the scanner’s oxygen sensor has detected a lean condition.
The condition is in the first cylinder of the engine (i.e. bank 1). In even simpler terms it means there’s too much oxygen in your car’s exhaust. Be sure to check for the meaning of each trouble code in the scanner’s manual.
Conclusion
So there you have it, a simple guide on how to make sure your long trip is a success. Remember to start by doing a manual inspection. The eight checklist points will help keep you safe on the road.
After that you may proceed to an OBD2 scan. It’s actually simpler than it sounds on paper, so don’t feel intimidated. Just make sure you know what each code means.

